Date:2026-02-13
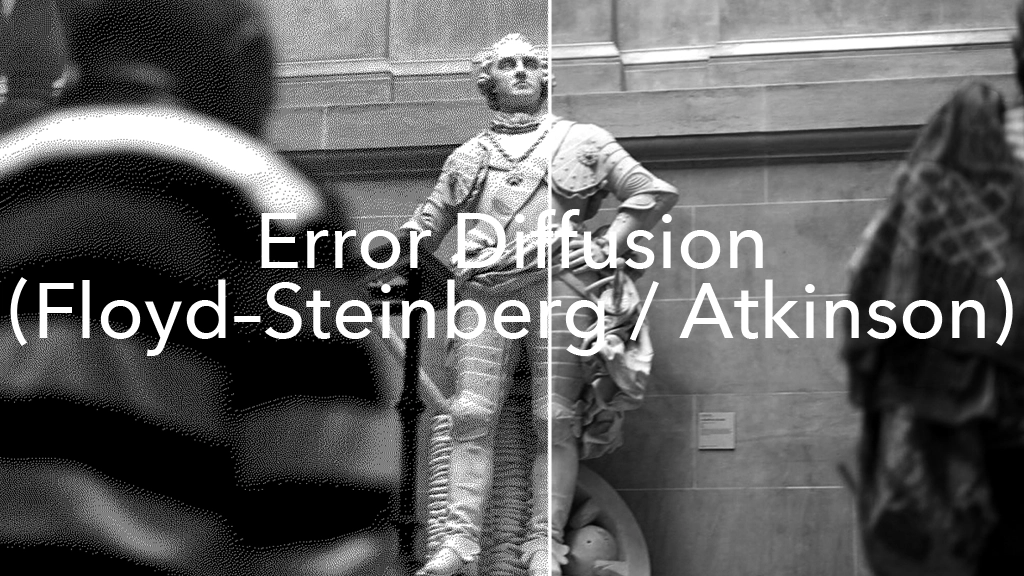
Error Diffusion (Floyd–Steinberg / Atkinson) in Processing : From Basics to Levels
Error diffusion is a dithering technique that distributes quantization error to surrounding unprocessed pixels as it proceeds, allowing smooth brightness gradients even with a limited number of tonal levels. Unlike threshold-matrix methods, it tends to produce a more natural, noise-like texture.
Dithering is a classic image-processing technique used to make images appear smoother in environments where only a small number of colors or tonal levels can be displayed. In the previous article, the most fundamental form of dithering ordered dithering was introduced, along with a Processing implementation using a Bayer matrix.
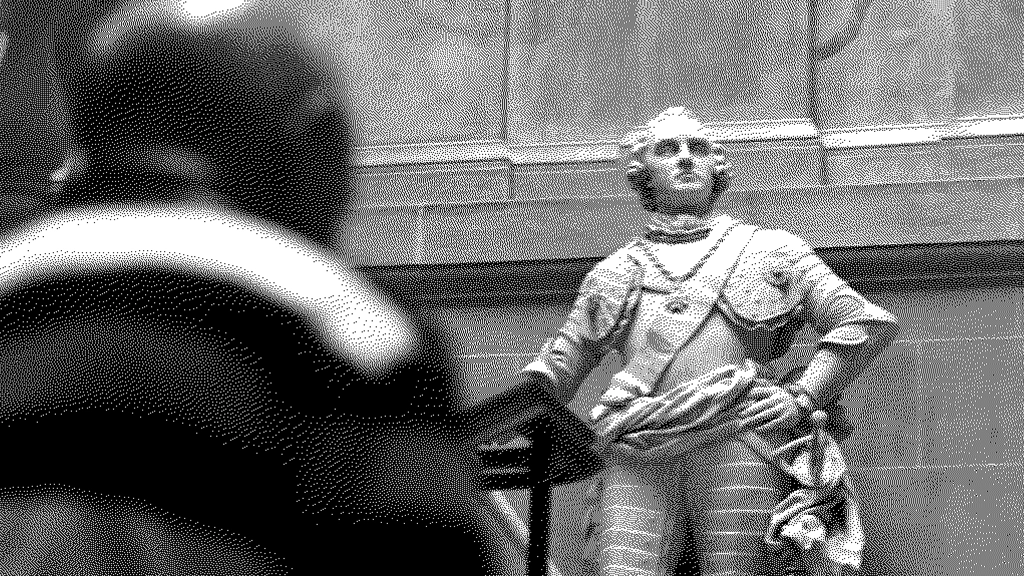
In this article, the focus shifts to the other major pillar of dithering: error diffusion. Two representative methods, Floyd–Steinberg and the widely used Atkinson approach in artistic contexts, will be implemented in Processing, and their differences from ordered dithering will be clearly compared.
The complete sample code for this article is available for download on Patreon.
☕ Support my Work:) / Coffee Supplier on Patreon
1. What is Error Diffusion?
Error diffusion is a dithering method that represents tonal gradation by propagating quantization errors.
In quantization such as black-and-white binarization, each pixel’s brightness is ultimately rounded to one of only two values:
- 0 (black)
- 255 (white)
However, this rounding process always produces an error.
For example, if the original brightness is 180:
- rounding to white gives 255
- the error becomes 180 – 255 = -75
Error diffusion does not discard this error. Instead, it distributes the error to nearby unprocessed pixels, so that the overall brightness stays closer to the original image.
2. Difference from Ordered Dithering
The Ordered dithering method discussed in the previous article works like this:
- change the threshold depending on the pixel position
- repeat a threshold map (Bayer matrix) as a tiled pattern
In contrast, error diffusion has different characteristics:
- it does not use a threshold matrix
- each pixel’s output affects the pixels that come next
As a result, the visible texture is not a regular repeating pattern.
Instead, it tends to look more like natural noise.
However, as a side effect, error diffusion is more sensitive in animation or real-time rendering. The pattern can change from frame to frame more easily, which often creates a “shimmering” or “crawling” look compared to Ordered dithering.
3. The Basic Steps of Error Diffusion
Most error diffusion algorithms can be explained with the following flow:
- Read the brightness of the source image
- Quantize the pixel (binarize or reduce to a small number of levels)
- Compute the error (original – quantized)
- Add the error to neighboring unprocessed pixels
- Move to the next pixel
The important point is that the algorithm needs a working buffer to store the values after error is added.
If errors are applied directly to Processing’s pixels[], the code becomes harder to manage because of color formats and type conversions.
A clean approach is to store only brightness values in a float[].
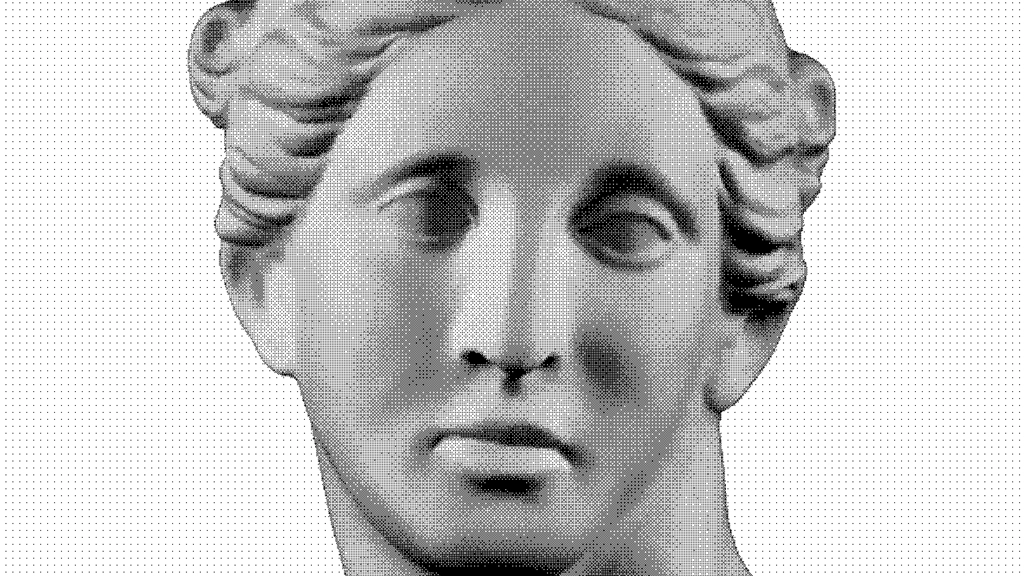
4. What is Floyd–Steinberg?
The most famous and fundamental error diffusion algorithm is Floyd–Steinberg dithering.
Floyd–Steinberg distributes the error to 4 neighboring pixels using fixed weights:
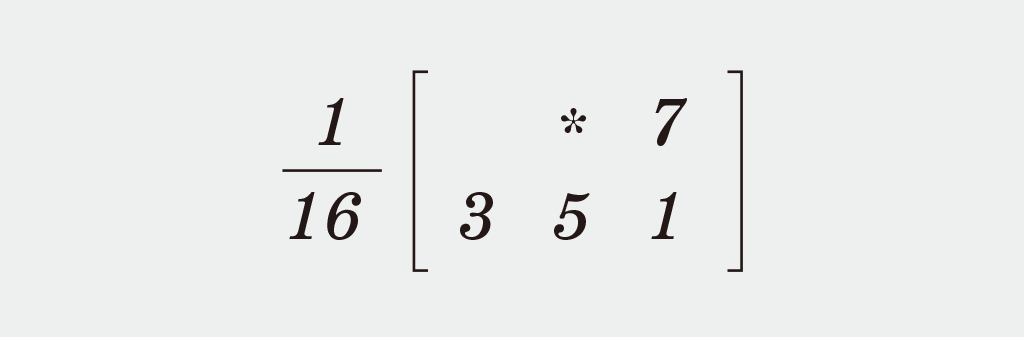
- right : 7/16
- bottom-left : 3/16
- bottom : 5/16
- bottom-right : 1/16
This method produces strong tonal representation and works well for photographic images.
5. Processing Implementation (Floyd–Steinberg / Binary)
Below is a minimal Floyd–Steinberg implementation.
As in the previous article, the structure is kept simple and readable, focusing on “a version that works in Processing”.
void applyFloydSteinberg(PGraphics source) {
  loadPixels();
  source.loadPixels();

  int w = width;
  int h = height;

  // Working brightness buffer (errors are accumulated here)
  float[] buf = new float[w * h];

  for (int i = 0; i < buf.length; i++) {
    buf[i] = brightness(source.pixels[i]); // 0..255
  }

  for (int y = 0; y < h; y++) {
    for (int x = 0; x < w; x++) {
      int loc = x + y * w;

      float oldV = buf[loc];
      float newV = (oldV < 128) ? 0 : 255;

      pixels[loc] = color(newV);

      float err = oldV - newV;

      // Diffuse error (with boundary checks)
      addError(buf, x + 1, y,     w, h, err * 7.0/16.0);
      addError(buf, x - 1, y + 1, w, h, err * 3.0/16.0);
      addError(buf, x,     y + 1, w, h, err * 5.0/16.0);
      addError(buf, x + 1, y + 1, w, h, err * 1.0/16.0);
    }
  }

  updatePixels();
}

void addError(float[] buf, int x, int y, int w, int h, float v) {
  if (x < 0 || x >= w || y < 0 || y >= h) return;
  int loc = x + y * w;
  buf[loc] = constrain(buf[loc] + v, 0, 255);
}
6. What is Happening in This Code? (Meaning of “Error”)
The key part of this implementation is these two lines:
float err = oldV - newV;
addError(..., err * ratio);
- oldV is the current brightness including accumulated error
- newV is the quantized output value (black or white)
The difference err is the information lost by quantization.
Floyd–Steinberg spreads this lost information to surrounding pixels, so that the overall brightness stays closer to the original image.
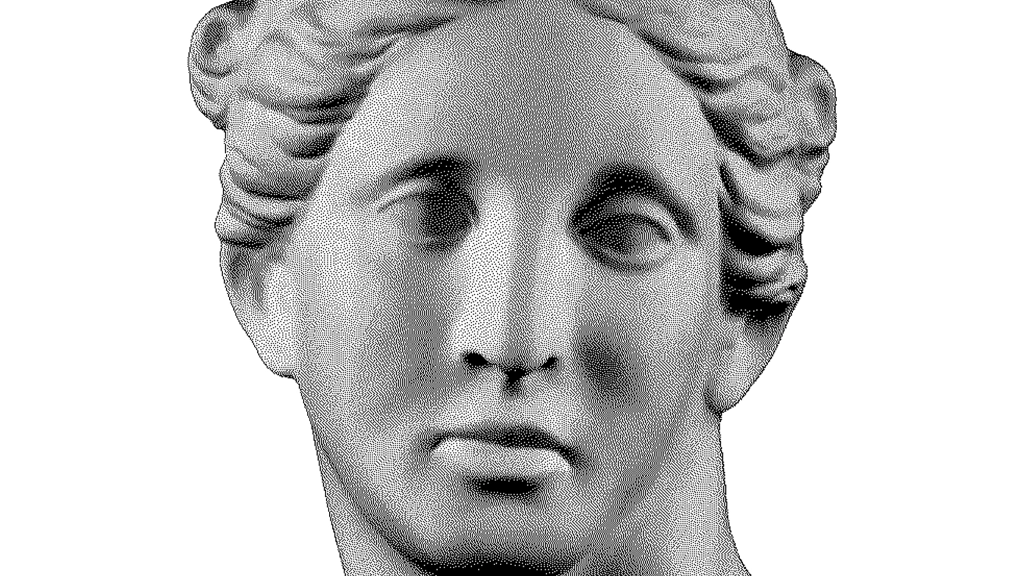
7. What is Atkinson?
Atkinson dithering is another well-known error diffusion method, especially popular in artistic and graphic contexts.
Atkinson distributes the error evenly (1/8 each) to 6 neighboring pixels:
- right (x+1, y)
- right 2 pixels (x+2, y)
- bottom-left (x-1, y+1)
- bottom (x, y+1)
- bottom-right (x+1, y+1)
- 2 rows down (x, y+2)
Compared to Floyd–Steinberg, the texture tends to feel lighter and more graphic, often closer to print-like patterns.

8. Processing Implementation (Atkinson / Binary)
void applyAtkinson(PGraphics source) {
  loadPixels();
  source.loadPixels();

  int w = width;
  int h = height;

  float[] buf = new float[w * h];
  for (int i = 0; i < buf.length; i++) {
    buf[i] = brightness(source.pixels[i]); // 0..255
  }

  for (int y = 0; y < h; y++) {
    for (int x = 0; x < w; x++) {
      int loc = x + y * w;

      float oldV = buf[loc];
      float newV = (oldV < 128) ? 0 : 255;

      pixels[loc] = color(newV);

      float err = oldV - newV;
      float e = err / 8.0;

      addError(buf, x + 1, y,     w, h, e);
      addError(buf, x + 2, y,     w, h, e);
      addError(buf, x - 1, y + 1, w, h, e);
      addError(buf, x,     y + 1, w, h, e);
      addError(buf, x + 1, y + 1, w, h, e);
      addError(buf, x,     y + 2, w, h, e);
    }
  }

  updatePixels();
}
9. Difference Between Floyd–Steinberg and Atkinson
Both are error diffusion methods, but the distribution patterns are different, which changes the visual characteristics.
Floyd–Steinberg
- strong tonal representation
- fine-grained texture, good for photos
- dark areas tend to be preserved
Atkinson
- lighter texture, good for graphics
- stronger contrast
- the image often looks slightly more “organized”
10. Extending to Multiple Levels (Not Only Black/White)
So far, the output has been fixed to 2 levels: black or white.
However, error diffusion can also be extended to multi-level quantization, just like Ordered dithering.
levels means the number of quantization steps (how many brightness values can be output).
- levels = 2 → binary (0 / 255)
- levels = 4 → 4 levels (0 / 85 / 170 / 255)
- levels = 8 → 8 levels
- levels = 16 → 16 levels
The core structure remains the same: diffuse the error produced by quantization Only the quantization step is replaced with multi-level rounding.
11. Processing Implementation (Levels Version)
Below are levels versions of Floyd–Steinberg and Atkinson.
Quantization function (0..255 → nearest level)
float quantizeLevels(float v, int levels) {
  float step = 255.0 / (levels - 1);
  return round(v / step) * step;
}
Floyd–Steinberg (levels)
void applyFloydSteinbergLevels(PGraphics source, int levels) {
  if (levels < 2) return;

  loadPixels();
  source.loadPixels();

  int w = width;
  int h = height;

  float[] buf = new float[w * h];
  for (int i = 0; i < buf.length; i++) {
    buf[i] = brightness(source.pixels[i]); // 0..255
  }

  for (int y = 0; y < h; y++) {
    for (int x = 0; x < w; x++) {
      int loc = x + y * w;

      float oldV = buf[loc];
      float newV = quantizeLevels(oldV, levels);

      pixels[loc] = color(newV);

      float err = oldV - newV;

      addError(buf, x + 1, y,     w, h, err * 7.0/16.0);
      addError(buf, x - 1, y + 1, w, h, err * 3.0/16.0);
      addError(buf, x,     y + 1, w, h, err * 5.0/16.0);
      addError(buf, x + 1, y + 1, w, h, err * 1.0/16.0);
    }
  }

  updatePixels();
}
Atkinson (levels)
void applyAtkinsonLevels(PGraphics source, int levels) {
  if (levels < 2) return;

  loadPixels();
  source.loadPixels();

  int w = width;
  int h = height;

  float[] buf = new float[w * h];
  for (int i = 0; i < buf.length; i++) {
    buf[i] = brightness(source.pixels[i]); // 0..255
  }

  for (int y = 0; y < h; y++) {
    for (int x = 0; x < w; x++) {
      int loc = x + y * w;

      float oldV = buf[loc];
      float newV = quantizeLevels(oldV, levels);

      pixels[loc] = color(newV);

      float err = oldV - newV;
      float e = err / 8.0;

      addError(buf, x + 1, y,     w, h, e);
      addError(buf, x + 2, y,     w, h, e);
      addError(buf, x - 1, y + 1, w, h, e);
      addError(buf, x,     y + 1, w, h, e);
      addError(buf, x + 1, y + 1, w, h, e);
      addError(buf, x,     y + 2, w, h, e);
    }
  }

  updatePixels();
}
12. When to Use Ordered Dithering vs Error Diffusion
As a practical guideline:
- for video / real-time stability → Ordered dithering
- for photo-like gradation → Floyd–Steinberg
- for graphic texture / retro feeling → Atkinson
In Processing-based artwork, dithering can be treated not only as image processing, but also as a method for generating texture. In that context, Atkinson is especially effective.
13. Error Diffusion
This article introduced the second major family of dithering algorithms: Error diffusion, implemented in Processing.
- error diffusion represents gradation by distributing quantization errors
- Floyd–Steinberg produces strong, photographic dithering
- Atkinson produces lighter, graphic dithering
- error diffusion is more likely to shimmer in animation than ordered dithering
- both methods can be extended to multi-level quantization using levels
14. Work Example | Sound visualization
Recommended Book / Generative art for beginner
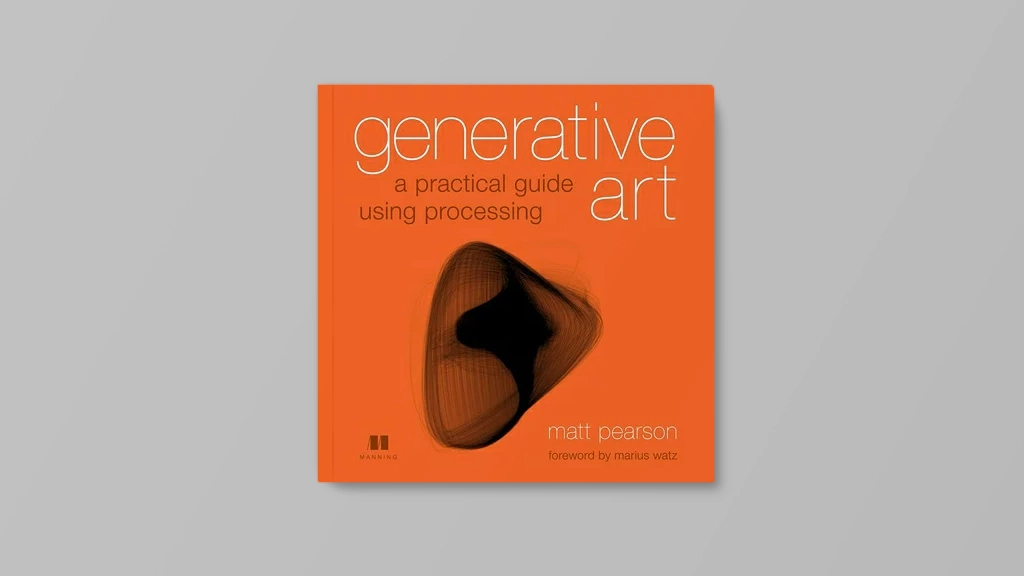
Generative Art: A Practical Guide Using Processing – Matt Pearson
Generative Art presents both the techniques and the beauty of algorithmic art. In it, you’ll find dozens of high-quality examples of generative art, along with the specific steps the author followed to create each unique piece using the Processing programming language. The book includes concise tutorials for each of the technical components required to create the book’s images, and it offers countless suggestions for how you can combine and reuse the various techniques to create your own works.
Purchase of the print book comes with an offer of a free PDF, ePub, and Kindle eBook from Manning. Also available is all code from the book.
—–
► Generative Art: A Practical Guide Using Processing – Matt Pearson
Publication date: 2011. July
Support my Website
By using our affiliate links, you’re helping my content and allows me to keep creating valuable articles. I appreciate it so much:)
BGD_SOUNDS (barbe_generative_diary SOUNDS)
barbe_generative_diary SOUNDS will start sharing and selling a variety of field recordings collected for use in my artwork “Sound Visualization” experiments. All sounds are royalty-free.
